Next Meeting dates

Here are the some dates for 2020 so you can all organise your diaries.

Aylsham -Saturdays 2pm -5pm (please ask for address)

8th February
7th March
11th April


Hethersett Village Hall - Sundays 09.30 - 12.30 pm


9th February
8th March
12th April


Saturday, 14 September 2013

September 2013 cards

Hi ladies Wow what a busy month I have had so far. For those of you who did not know my little “Mini Me” left for her new life as a boarder at Wymondham College. I can tell you now my house has only been this quiet & tidy since before she was born but it doesn't take her long to convert it back to its usual state when she gets home at the weekends!!!!
This month I have 3 cards for you but you will notice 2 are the same concept but time willing you should be able to get all 3 designs completed.
So here goes:
Card 1 – I think I caught a snowflake 
IMG_6246
Card Supplies
C6 White card
Patterned paper for background – blue spotty works best
Spare black, white & orange card
Glitter card for snowflakes
Circle punches – 2 1/2”, 1 3/4”, 1/4”

Card 2 – Nestie pull-out
IMG_6247
Card Supplies
A4 sheet blue card
Spare white & black card
Scoring board
Favourite colouring medium – I used promarkers
Small gems – I coloured mine to match my flower
You can bring your own stamps & ink if you have a design you would like to use – maximum size 7 x 8cm

Card 3 – Nestie pull-out take 2
IMG_6250
Card Supplies
A4 sheet purple card
Spare white & blue card
Favourite colouring medium
Own stamps & inks if you wish to use your own.
If you would like to make the above card in a Christmas design then please swap the card stock for more appropriate colours & bring your own stamps

Friday, 6 September 2013

September cards - Aylsham only

Hi Ladies, just to let you know that all those attending Aylsham meeting tomorrow need only bring their basic kit as I will supply all your other card ect. If you could include in your kit your favourite colouring medium that would help.

I will post Hethersett cards nearer the time
See you tomorrow or at Thetford show on Sunday xxx

Friday, 30 August 2013

New September date

Hi ladies just a quick reminder that as the next Hethersett date clashes with the Thetford Craft show we have arranged a new date for Sunday 22nd September.

The date for Aylsham will remain unchanged on 7th September.

Tuesday, 6 August 2013

Cards for August 2013

 Hi there ladies hope you are all keeping well & that you enjoyed the recent hot weather we have had. I was fortunate enough to bag  2 weeks off so thoroughly enjoyed it, although I just wished it could have been slightly cooler overnight, as our hotel room registered a whooping 32 degrees at night despite the air con & fan!!!

My 2 cards this month follows a request from our 2 youngest members – Courtney & Chelsea who wanted some cards with butterflies on. I hope you both like what I came up with.

So here goes:

Card 1 – All of a Flutter

IMG_6430
This card has a real 3D effect to it whilst being able to go completely flat for easy posting.

Supplies needed

C6 base card – mine was black
Mat layer 10 x 14.3cm – mine was the new SU colour – Pistachio Pudding (got to LOVE that name) which is a pale green
3 different scraps of coloured card – I used the colour above plus the new SU Coastal Cabana (Blue) & Strawberry Slush (Pink)
White card
Ink to coordinate with one of your scrap colours – mine was Coastal Cabana (Blue)
Sentiment stamp & black ink
Embossing folder
Coordinating ribbon – approx 1cm wide
Stick on Gems
3D foam pads
IF anyone owns the SU Top Note & Beautiful Butterflies dies & don’t mind sharing them could they bring them along as it will speed things up.

Card 2 – Flutter By

IMG_6425

Supplies needed

C6 base card- mine was cream
Black card mat - 10.2 x 14.5 cm
Newsprint paper - 9.9 x 14.2cm
Acetate
Stazon ink
Butterfly stamps
Promarker pens or similar i.e. Copics, permanent markers - need to be bright colours
Strong clear glue i.e. diamond glaze

Card 3 – Fun with Snow – if time allows


Supplies needed

white square base card
extra white card
sheet of patterned paper
A4 silver mirri
A5 matting card (dark)
10 x 6.5 cm picture stamp
sentiment
Archival ink (or similar) mine was coffee
Colouring medium
Blue ink and brushes or sponges

Thursday, 11 July 2013

July’s Cards–MERRY CHRISTMAS EVERYONE


Apologises first, I did this blog post at the beginning of the week & have only realised today that none of you could see it & the reason for that was………..

I had saved it to draft rather than uploading it – what a numpty I am…….I really must learn to double check the postings before going on to my next job.

Apologies over with I wish is say a really HAPPY CHRISTMAS in JULY to you all. If any of you saw the Lord Mayor’s parade on Saturday you will have seen how our little celebration is spreading – at least one float was celebrating just that = Christmas in July YIPEE.

I want no excuses for you all not wearing your best Christmas finery this weekend …so dust off those christmas earrings & let the fun begin.

Card 1 – Elfing Around

IMG_6078

this was a card i found on the internet & i thought it would be perfect to get us in the Christmas mood. I hope you all like it

Supplies needed

C6 Green Card PLUS extra matching piece

Spare white & red card

Red Glitter card

Stripey patterned paper

Bakers twine/thin ribbon

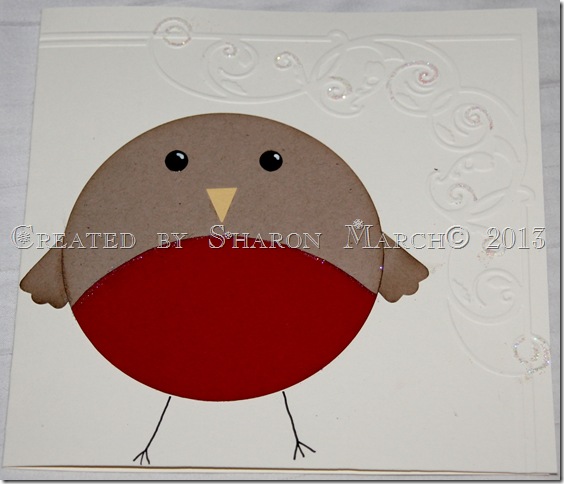
Card 2 – Robin Redbreast
IMG_6075

The robin was again something I found whilst browsing the internet but I have changed the background he is on to one of my own.

Supplies needed

14.5 square cream card

Spare brown, red, black & yellow card

Glitter pen or glue pen & glitter

Black marker pen

White pen

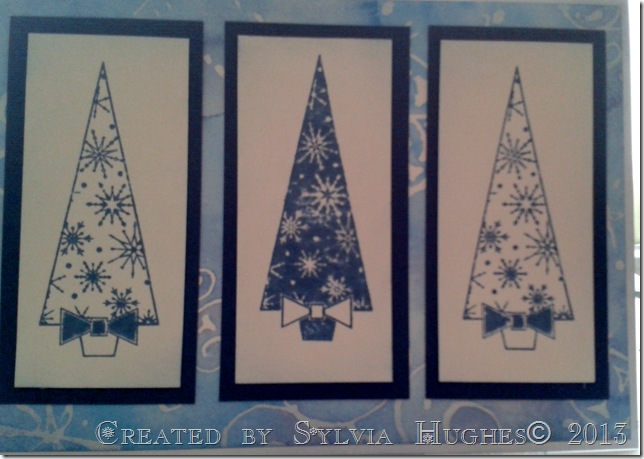
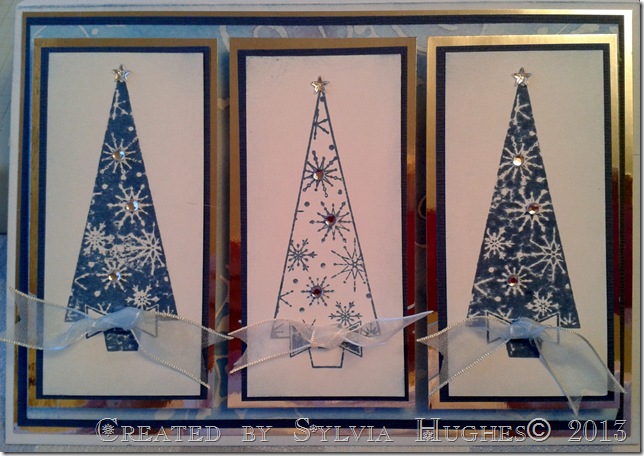
Card 3 – Positive / Negative Christmas Trees

Hopefully there will be time to do both versions of this card

Version 1 – The Posting one
2013-07-09 17.44.19

Supplies needed

Sylvia’s design was done in blue so all the matting card/xmas paper/ink were shades of blue

C5 white base card (A4 folded in half)

Christmas paper to cover front

Dark matting card

More white card

Ink and we'll being swirling ink onto our cards so bring your brushes or sponges

Stamps - positive and negative stylistic Xmas trees (about 4 inches) could be done with baubles, etc)

Version 2 – Blinged up
2013-07-10 21.18.32

Supplies needed

so another set of the same original items as above plus

A4 sheet of mirri card silver (if working with blue)

round gems plus star gem (if you are using a tree stamp)

and ribbon(I used organza in blue and white)

3d pads

Wednesday, 5 June 2013

June’s Cards 2013

Well hello again ladies, can you believe we are nearly halfway through the year?
At least the nice weather has at last made an appearance. I don’t know about you,  but I do find it hard to go to my craft room when the sun is shining & my lovely garden is calling to me…….but I have been good & I have been there so here are this months cards, which mostly have a male theme to them as we have Father’s Day in just over a weeks time.
As Sylvia said in her email the 1st three cards involve using templates so if you wish to strength yours, so they can be reused, you will need to bring some old acetate with you.
Card 1 – For the Office Guy
IMG_6070
Supplies needed
C6 white card
Striped paper ( needs to be shirt like)
Coordinating paper to make a tie with
Coordinating card stock & pen - mine were navy
Scrap white card
2 small brads - mine were silver
Pricking tool & mat

Card 2 – Outdoor Man
IMG_6072
Supplies Needed
C6 card - mine was blue to match my paper
Checked paper
Coordinating card stock
3 small coloured buttons
4 small brads
Coloured pen to match paper

Card 3 – Saw it
IMG_6074
Supplies needed
A4 sheet of white card - strong enough to make card base
Scrap card - brown, dull silver
Patterned paper - mine was text
Black biro pen
Brown ink & sponge dauber

Card 4 – Goosy Goosy Gander

june card
Supplies needed
A6 white base card
plus extra white card enough to cover front of card and punch out daisy and stamp extra image
other card to cover front (mine was orange)
Cherish friendship StampinUp set or background stamp and animal stamp
post it note for masking
ribbon mine was orange gingham just under a cm
Gems - mine were orange
a Stamp a ma jig if you've got one ( unless you're using clear stamps)
Archival ink (or whatever you use that doesn't run) mine was coffee
Your favourite paint medium
Daisy punch

Wednesday, 8 May 2013

May’s 2013 Cards

Hi everyone hope you all had a great Bank holiday. I unfortunately had to work so missed out on all the good weather that I hear was happening outside.

Well back to this months cards and this month it is all about…………….

TWINKLING H2Os

I will endeavour to enlighten those of you who have never heard or used these little pots of magic and for those of you who do own these beauties then I hope to teach you some new techniques.

So here are this months samples:

Basic Supplies

Twinkling H2Os

Paint brushes

Paper towels

Water mister

Small pot to hold water

Sea salt – NO I’M NOT BRINGING US ALL CHIPS!!!

Card 1 – H2O resist

IMG_6061

Supplies

A4 sheet coloured card

White card

Subtle patterned paper

Scallop circle punch

1” circle punch

3/4” circle punch

1/2” circle punch

3D foam

Card 2 – Do you want Salt with that????

IMG_6058

Supplies

C6 card blank – needs to match h2o colours

White card

Spare black, light brown & blue card

Coloured gems (or clear)

Background stamp

Grey ink

Black ink

Suitable image stamp

Sentiment stamp

Scrap of ribbon to coordinate with H2O used

Card 3 – A Little more Salt needed???

IMG_6055

Supplies

C6 card blank

Black card

White card

Patterned paper

Black ribbon

Thin coloured ribbon

Gems

Hope that all makes sense & see you all at the weekend